Today I started with drawing some panellines and screws/rivets. The lines do not fit everywhere yet.
Just to look at the effect i duplicated them in white to give them abit 3D and added shadow for the screws/rivets.
For better showing i did a very complex camouflage
Thats it sofar, I wuld really like to hear some feedback, cause its the first time I do a skin from the beginning and tips are very welcome. When you can see theres something going in the totally wrong direction please tell me!
Good stuff so far PAF, couple of little tips for you. I put a white line both sides of the panel line, because of the lighting in IL2 a single white line will give a look of a raised line and from another angle it looks like a groove. Adding a white line both sides gives the panel some definition and isn’t affected by the light in game. Rivets really give a skin depth, I use a 0,0 setting on drop shadow around rivets, it looks like a build up of dust and grime around the rivet. Also try white for rivets, some colour schemes pick out the white better, some work better with black. Or try both white on panels and black on inspection hatches.
But most importantly well done for starting a skin from scratch, it’s much more satisfying when you know all the work is your own. Even if it doesn’t come up to scratch with some of the top skinners at least it’s your own work not a rehash of someone else’s template.
Paf, good luck there
Making templates is one of the best ways I can think of to learn what the aircraft really looked like - and finding errors in the in-game visual models!
Just to add confusion, when making templates, I think of the lighting coming from about 45 degrees, up and out from the nose.
That is, for templates on the left side of the plane, the sun is at about 10 o’clock, on the right side it’s about 2 o’clock
I think of the lighting coming from about 45 degrees
The trouble with building a template with lighting from a particular angle is that when in game if the light isn’t coming from that particular angle it will look odd.
Which is why I put a white line both sides of the panel line, it works well. From which ever angle in game you use it will look indented.
Have a look at the example below. If you look closely at the panel lines you’ll see a faint white line surrounding them. This gives a slight highlight to the panel edges making the dark panel line look like a recess
Here’s something I saw ages ago on creating 3d lighting effects. I can’t remember where I saw it posted or who it was, but it has been really useful…
What do you mean by 3D layer? Are you looking for the lighting effect for a part with gradual darkening going to the edges, like a soft shine on rounded parts?
If so…
Do one major part at a time, cut a wing for example. Paint it a light, very light, shade of grey. Select the little stylized ‘f’ Add a Layer Style thingy on the lower layers list panel.
Once you called up the menu select “inner shadow”.
Check ‘multiply’ for blend mode.
Good start settings below, but your going to have to adjust for part size, angle, shape, and such, these settings will get you ball park for your average part.
Opacity 64%
Distance 34 pix
Choke 41%
Size 114 pix
If your doing several parts turn off the Global lighting. Leave noise off, but you can get great results by putting some in than using the Gaussian Blur after.
Now just monkey with the angle and adjust your parameters to get the right shading. Just lay this layer over your paint and scale the opacity and fill to suit. Want a nice metalic effect, copy your shade wing, merge it with a three seperate shades of red, blue, and green, than adjust those over your metalic paint.
Mess around with different layer styling features and it will quickly become your pal.
Wow, thanks for all the Tips!!
Ive found a good way for the panellines i think its going in the direction Brigstock was showing, i hope i can show some results soon
Yet Im not sure of the rivets, if I go for white or black ones. But I think i do both with different weathering and gonna look which are better for which camouflage.
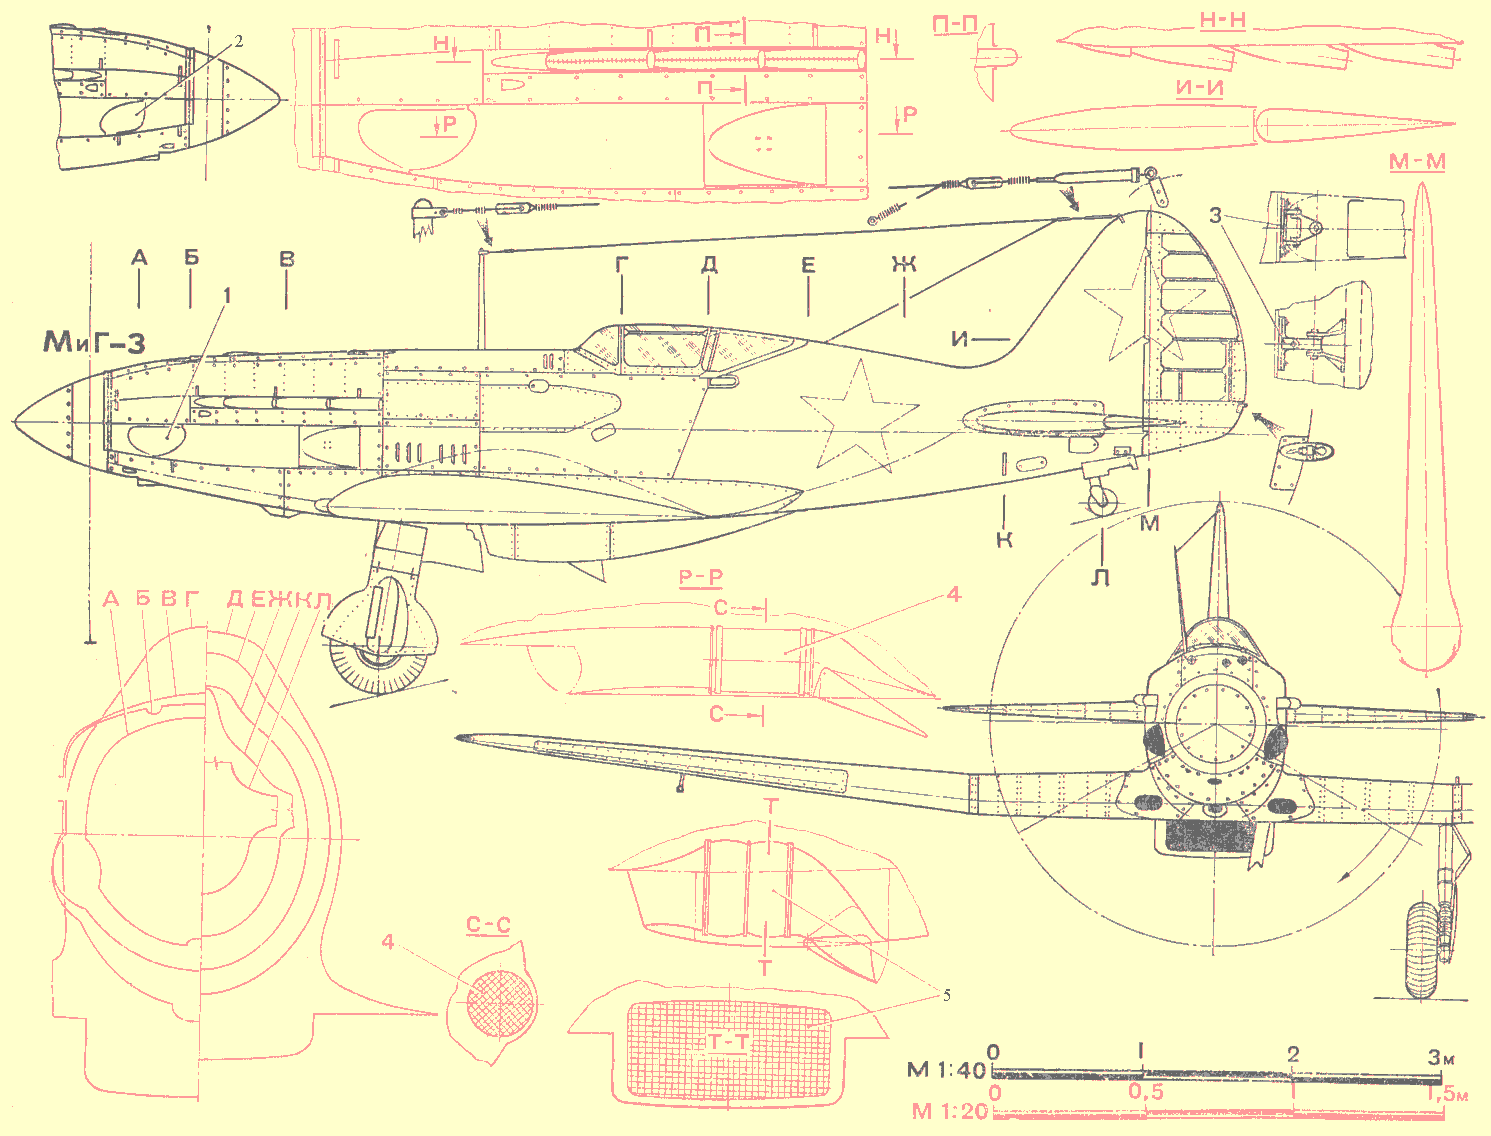
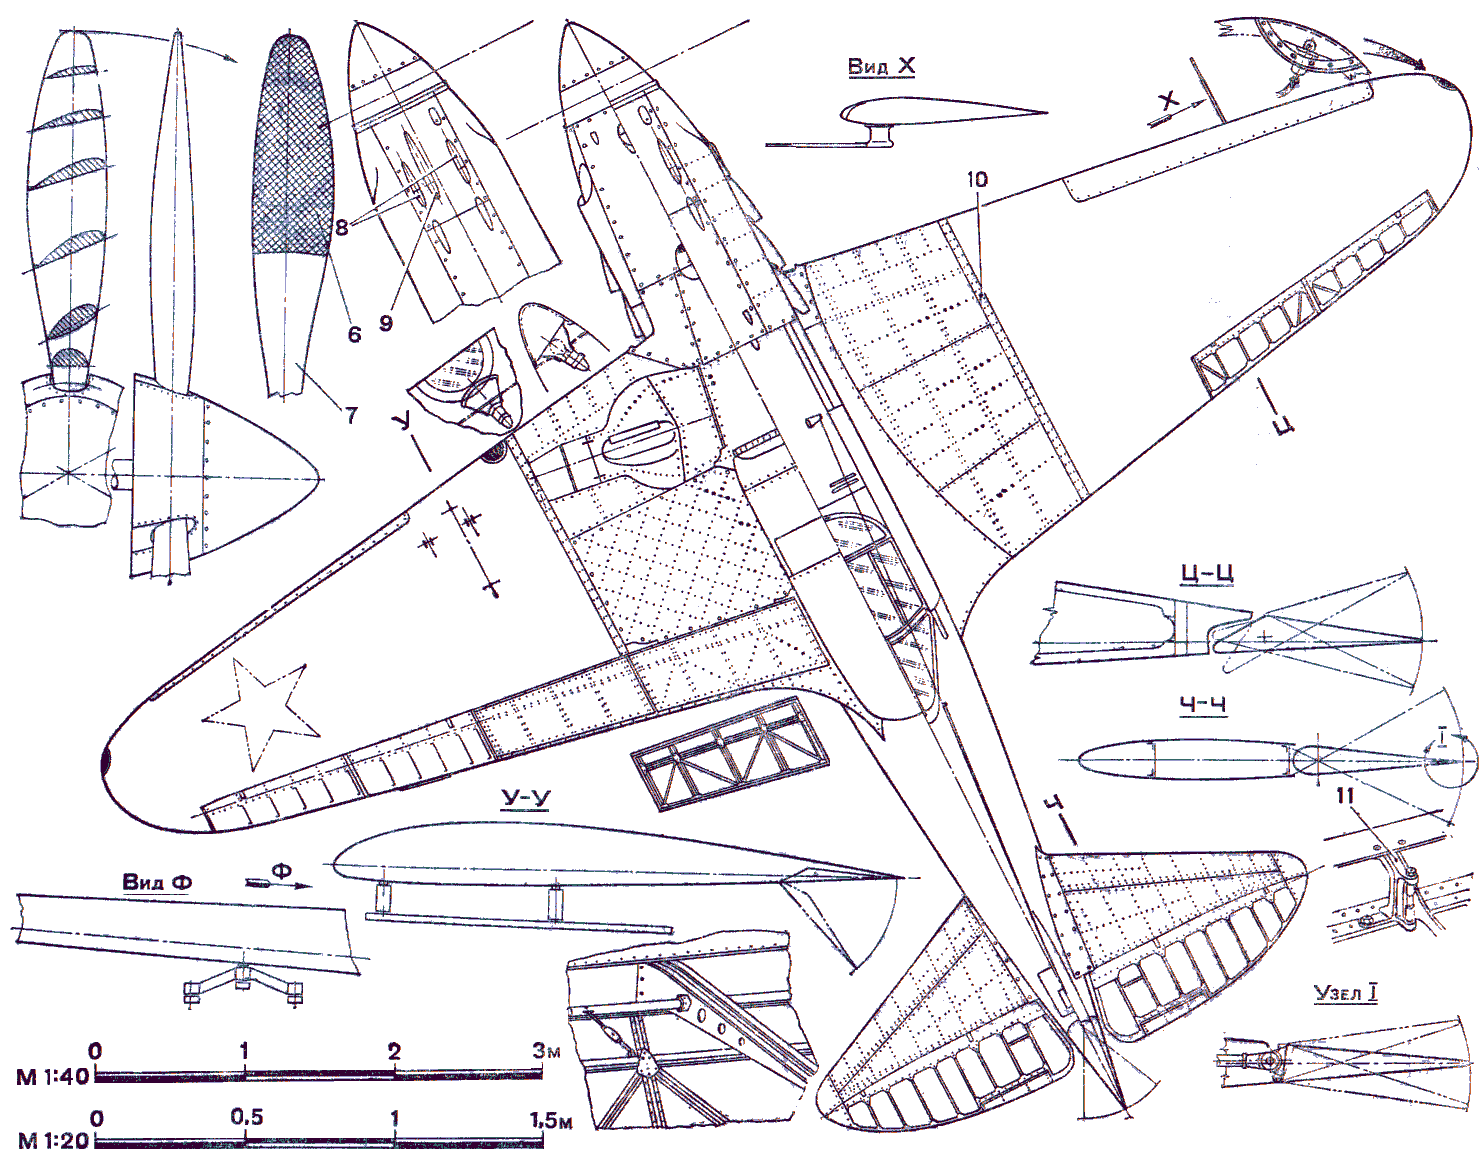
Also I found a nice MIG 3 site with good material, so I gonna begin again from scratch with a bit new technique and new material
I did rivets in black and white , also sorrounding of rivets dark and white.
So I can choose for dark or bright camouflage, which looks better.
Big rivest and screws will follow later.
I did 2 kinds of different rivetlayers. The first are the rivits to the border of the panels which are abit clearer and the second layer are the little rivets going across the panel.
Unfortunately the Mig is not a good void compared to other planes, so even one pixel shows quite big on the plane.
Most time went into getting the panellines right to the 3D Model.
But its nearly done now, …for the nose
I finished the panellines and rivets sofar. So i tried to do some effects.
When i was trying to do some panelshading one WIP looked quit good and gave me the idea to do a baremetal nose. So I tried and experimented the day for metal effects. This is the first time i try some lightening and bare metal but im happy sofar for this day, with further experiments maybe my skills will grow and the effect gets better
Had alot to do last time and tried to go on with my skin yesterday.
Now im in a period where im making and deleting layers all the time with nearly no process.
I did this paint in a few minutes , just to do something different again and to see a result of what i have done, so don’t go for the camo mistakes
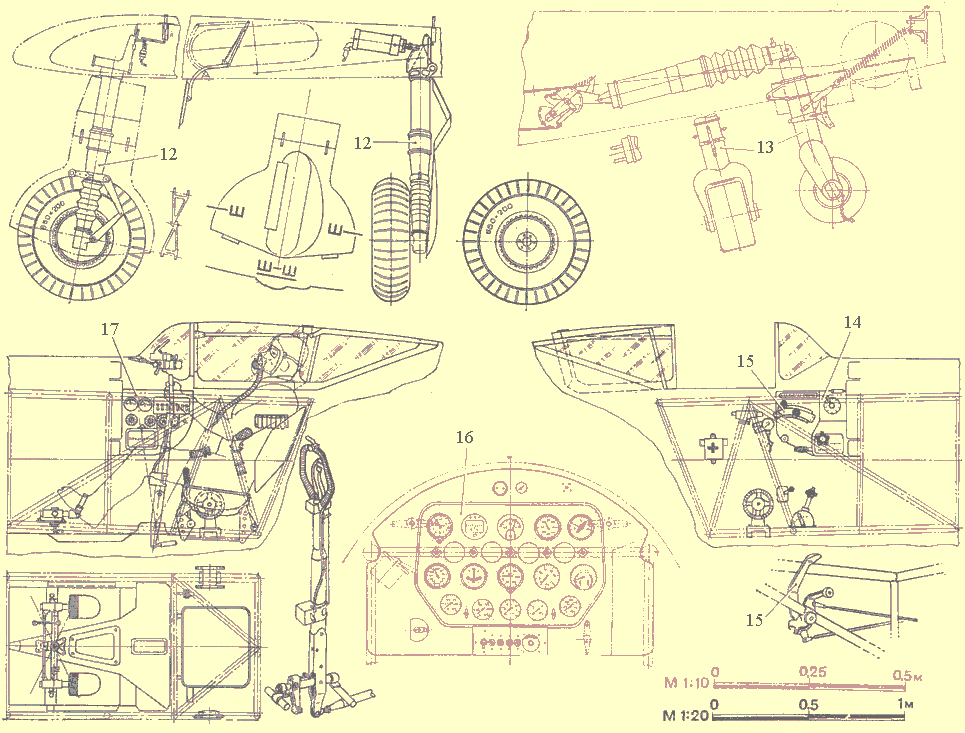
Alot of detail still to do, flaps rudder, cockpit …
It’s looking really good so far Paf, well done. Your panel lines and rivets are looking particularly good as is the paint texture.
I’m looking forward to seeing further updates:)
Thx for the nice replies!
Yes Painter, I was working with this one, its really nice
I don’t know if I will release this template, its very chaotic if you know what I mean, alot of layers with weird names
ok, i think i have finished it sofar
But i still have the feeling that i forgot something and its NOT finished
One problem is there i can’t solve, the texture for the canopy is mirrored at the blend for the exhausts. So when i paint the canopy green, i have at black nose, which looks reall wrong, so i made the canopy a grey.
Everything is painted by me, except one layer I used for metal parts, which is from Jesters Tempest-template. If i can do one that gets near to it i will replace it. But after experimenting hours for hours i decided to give up on this one :rolleyes: